Brighten up your holiday table with this lovely dessert. I recommend baking it a day ahead. Keep in the fridge in a tightly covered container (chilling firms it up and makes cutting easier, and the bars come out cleaner and neater) then cut into rectangles or squares just before serving.

Cook’s notes
The EXIF data of the photos say I baked these squares on August 27, 2013. I’m republishing the recipe because this is a dessert that looks and tastes like it belongs perfectly on the holiday table. It is September already after all and, in the Philippines, the Christmas season has begun.
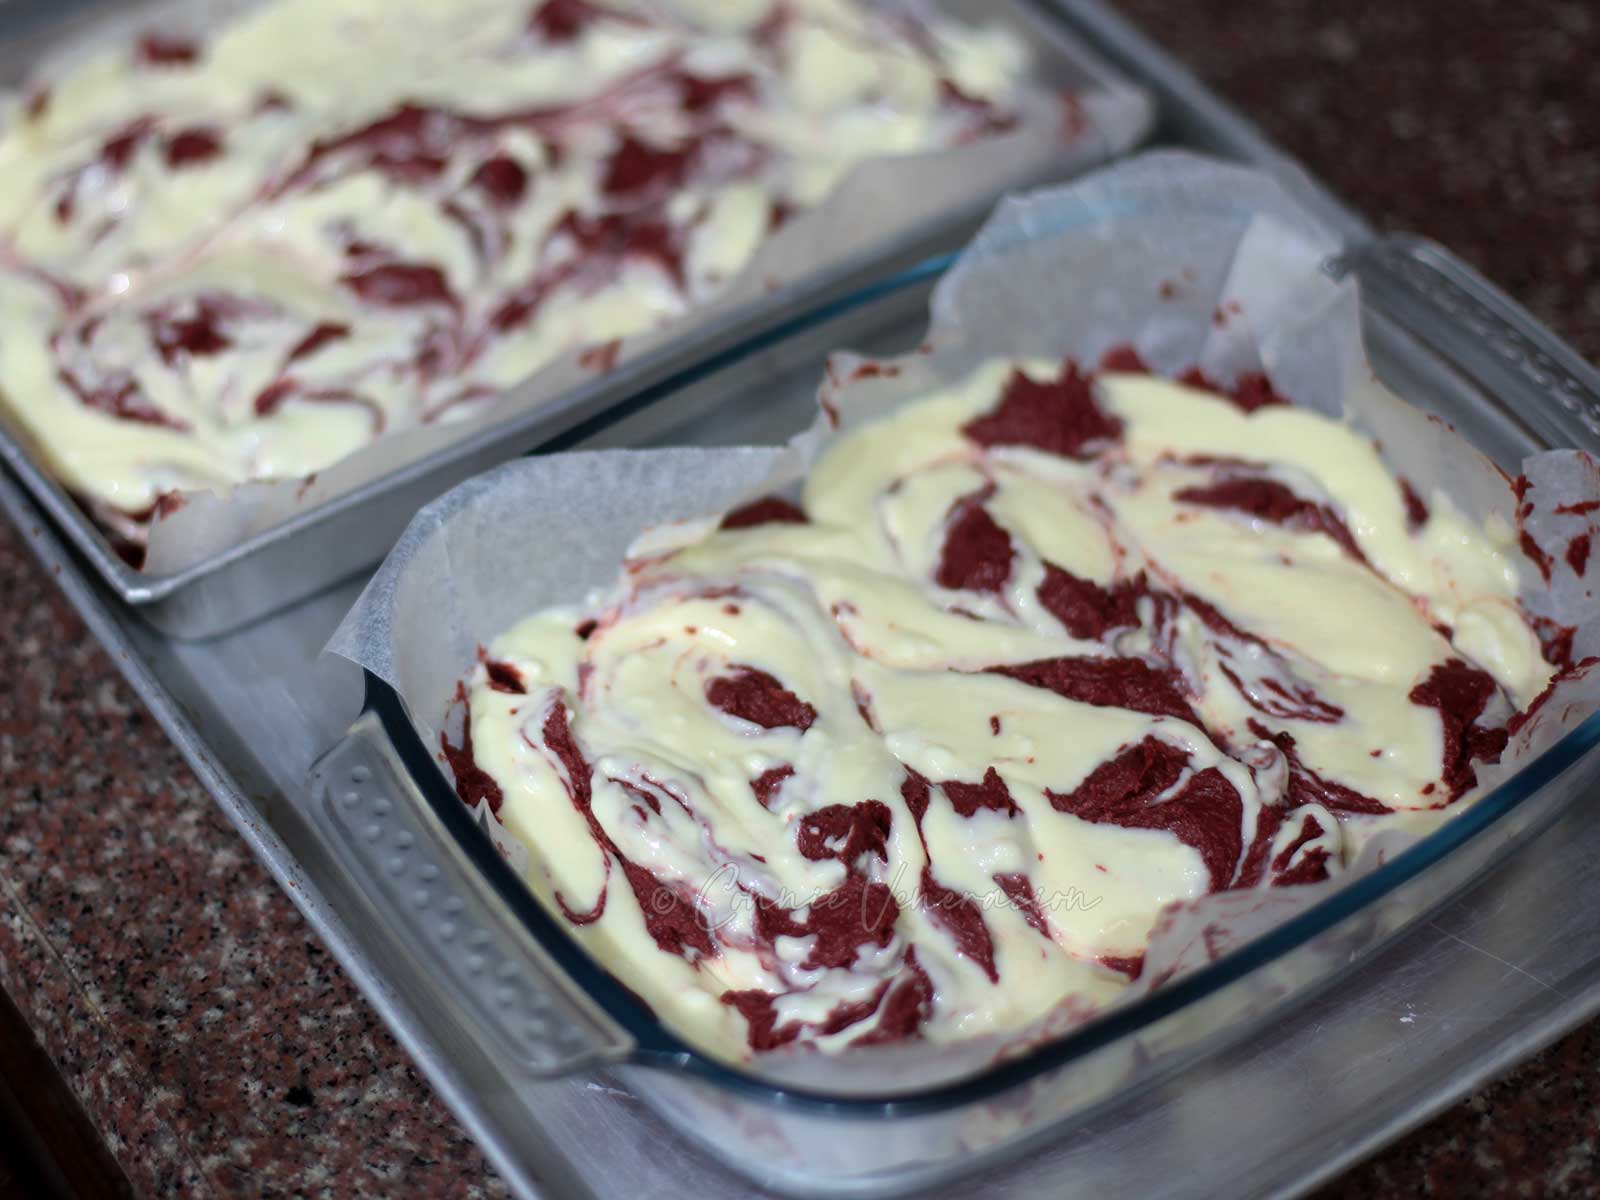
This dessert consists of two mixtures. The first is the red velvet cake mixture which has the consistency of brownie batter. The mixture is divided into two portions. One goes on the bottom of the baking pan; the other portion goes on top of the cheesecake. It’s not a pourable batter — the first portion has to be spread in the pan to form an even layer.
The second is the cheesecake mixture which has cream cheese, eggs and sugar. No cream. While this mixture is pourable, you will still need a spatula to spread it so that it completely covers the red velvet layer.
Then, you take the second portion of the red velvet mixture, and drop it by spoonful on top of the cheesecake. Take a thin blunt knife or a skewer, dip into the layers then drag to create swirls.
A few things about some of the ingredients…
Adapted from a recipe by Sunny Anderson.
Butter, in baking, usually means unsalted butter. If what you have is salted butter, it is perfectly alright to substitute. BUT omit the salt in the ingredients list.
We used to make our own vanilla sugar for baking and even for sweetening coffee. If vanilla sugar is not available, use the same amount of sugar plus a quarter teaspoon of vanilla extract. Add the extract to the red velvet mix at the same time as the cocoa powder.
Red food color comes in liquid and paste form. The two tablespoons of red food color in the ingredients list means two tablespoons of liquid red food color. If using a paste, you will need much less. Start with half a teaspoon and just add more, little by little, until you get the hue that you like.
Red velvet cheesecake bars
Ingredients
Red velvet batter
- 1 cup butter softened to room temperature
- 2 cups vanilla sugar or use plain sugar plus ¼ teaspoon of good quality vanila extract
- ½ cup cocoa powder
- ⅛ teaspoon salt
- 2 tablespoons red food color
- 2 teaspoons white vinegar
- 4 medium eggs
- 1 ½ cups all-purpose flour
Cheesecake batter
- 500 grams cream cheese softened to room temperature
- ½ cup sugar
- 2 medium eggs
Instructions
- Preheat the oven to 350F.
- Line the bottom and sides of two 11 x 7 inch baking pans with non-stick baking paper.
Make the red velvet layer
- Beat the butter and sugar until light colored and smooth.
- Mix in the cocoa powder, salt, red food color and vinegar.
- Add the eggs, one at a time, mixing after each addition.
- Add the flour in three or four batches, mixing after each addition.
- Take a cup of the batter and set aside.
- Divide the remaining batter into two equal portions.
- Spread one portion on each of the two prepared pans.
Make the cheesecake layer
- Beat the cream cheese, sugar and eggs until smooth.
- Divide the mixture into two portions.
- Pour one portion into each pan over the red velvet layer.

Create the swirls
- Drop the reserved red velvet mixture on top of the cheesecake in both pans.

- Dip a skewer or a thin blunt knife into the batter then drag from top to bottom, and then sideways, until the dollops of red velvet are embedded into the cheesecake batter.
- Bake at 350F for 30 minutes.
Cool and cut
- Take the trays out of the oven and place on racks. Leave to cool completely.
- Slide each uncut red velvet / cheesecake combo (do not peel off the paper) into a container, cover tightly and chill for several hours or overnight.
- Cut each slab into 18 squares.

 Chicken, mushrooms and rice casserole